 PRE•CI•SION (noun): The quality of being precise: exactness or accuracy: the quality of being reproducible in amount or performance.
CON•SIS•TEN•CY (noun): A harmonious uniformity or agreement among things or parts.
AC•CU•RA•CY (noun): Freedom from mistake or error: the quality of state of being accurate: the ability to work or perform without making mistakes.
Precision, consistency, accuracy, those are the three founding values of the MAGPUL Dynamics training curriculum, for all shooting disciplines. Having taken the Precision Rifle 1 course for the first time in 2012, I was eager to complete the course again in 2013.
I have been shooting guns since I was a young girl with my dad, with good and bad experiences associated with that; scoped in the face more than once, had a lot of successful hunts and some unsuccessful hunts. I have picked up some good habits along the way and a few bad ones.
For me, training with experts is helping me to develop correct fundamentals and techniques while eliminating some old bad habits not to mention the “gear shakedown” and lessons learned from that.
DAY 1- The Shakedown….
The first morning, class gathers and we discuss the basics of shooting fundamentals. Caylen does a tremendous job of breaking down each component from the weapon, optic, ammunition and finally the shooter and how all of those components must work together in order to achieve those down range, first round hits.
Having the basic understanding and ability to identifying those components and the limitations within each component can help trouble shoot what we see on paper at range.
FUN•DA•MEN•TAL: A basic principal, rule, law or the like, that serves as the groundwork of a system; essential part.
I have had successful hits without training out to 400 yards, beyond that, not a chance. In 2011, I was 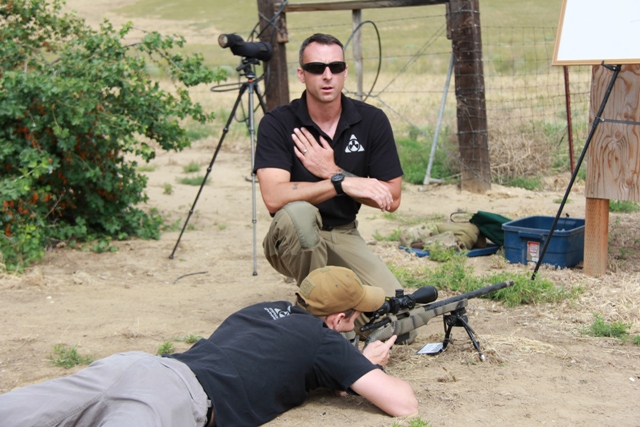 Caylen discussing the fundamentals of shooting while Tim demonstrates on the gun.on an elk hunt and after 10 days of hard hunting, I was presented with a shot at a cow at just over 400 yards, unfortunately, I was not confident enough with my own ability or my weapon system to take the shot. Let me tell you, it was a huge disappointment for me.
I truly believe that in the field, one does not rise up to the occasion but instead fall back on training. In that moment, I had no formal training and I was not competent enough to ethically take that shot.
Everything goes back to your foundation and that foundation is built on mastering the fundamentals of marksmanship, regardless of your situation. Let’s face it in the field Mother Nature is anything but predictable. Learning what the basic fundamentals of marksmanship and the basic application of those fundamentals behind the gun translated for me into successful first round hits.
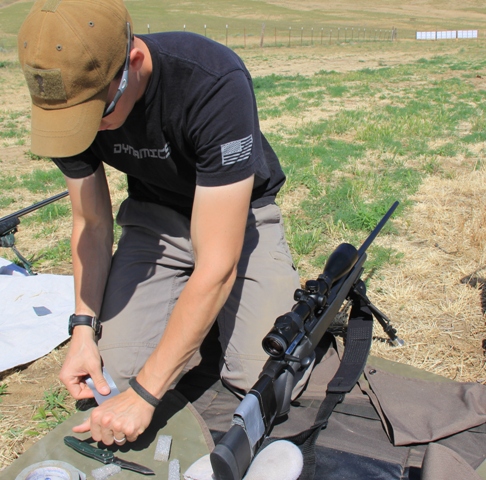 Tim building a cheek weld.Gear Shakedown…
Classroom time over, now it was time to get behind the gun on the 100 yard line to put those newly learned fundamentals to the test but first an equipment evaluation was necessary.
Bad past experience: I’m on a hunt and am handed a rifle, “Ok sweetie, this thing is a tack driver…” blah blah blah. Sure that rifle may be a tack driver for a guy 6’2” but it is not going to drive a tack for me at 5’2” and chances are, I will scope myself and miss my target. Look/feel stupid much?
Don’t do this; DO NOT borrow a rifle, especially one that you have never shot.
On the line, I learned a lot about my own personal weapon system. Thankfully, I have my length of pull correct for me on all my rifles and I have my triggers adjusted or replaced to the poundage that I prefer and my optic eye relief is perfect for me. All set right? Nope…
There are bi-pods, bi-pod stakes, bi-pod cord, weapon load, slings, grip positioning, trigger finger placement and cheek piece height. All these items must all be taken into consideration for each individual shooter. Is your scope mounted level? How about those scope rings are they hand lapped? Then there are all of the components to your rifle to consider.
Bottom line, as a hunter, it is our job to understand our own individual weapon system, how it works, what we can do to improve upon it and know its limitations as well as our own. Thanks to my day 1 shakedown, I have complete understanding of my weapon system, where improvements can or should be made and where limitations are therein.
Day 2- The Long Range….
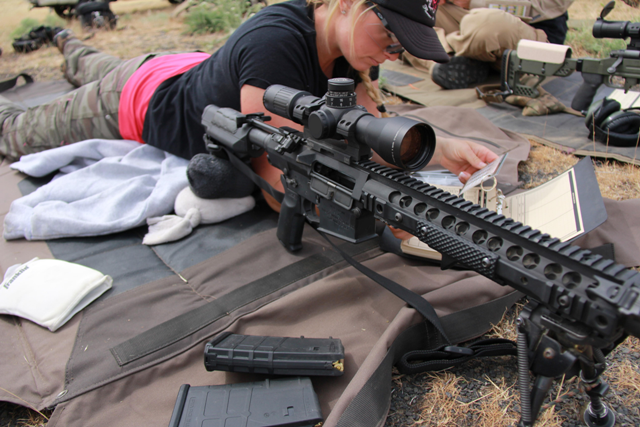 On the line evaluating my data charts before engaging targets.In the classroom, we learned about external ballistics and how to create individual drop charts for various ranges based on our individual weapon system caliber, bullet type, muzzle velocity, density altitude and temperature.
Caylen is great about teaching us to use this super technology as a guide but not a crutch. We were all taught how to create our “dope charts” with our personal ballistics program and then to transfer that information onto data cards for infield use. Technology has an aptitude for failing so relying on it is a mistake, especially while hunting. If your batteries die or you drop your phone that contains your dope chart, you are out of luck. Use the technology as a tool and learn how to make it work for you fundamentally in the field.
I personally create two charts for a low and average temperature for my specific elevation, taking only those into the field. Nothing else is then needed.
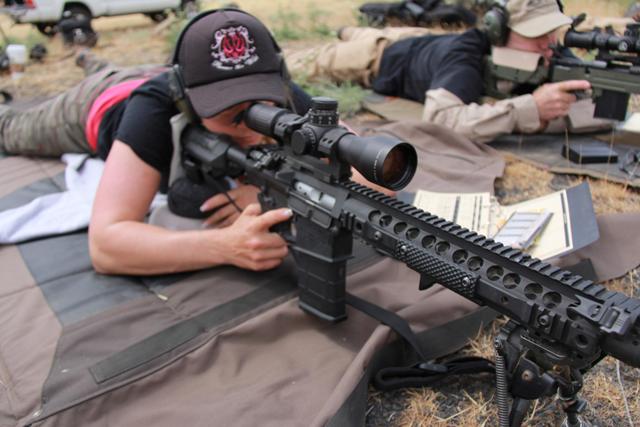 Proving Data
On the line, numbered steel targets are placed from 400-1066 yards. As I stated earlier, without training, 400 yards was my farthest shot taken and this was our starting point; time to put those new fundamentals to work using the data charts we had just completed in class.
The sound of ringing steel filled the air. Nearly every data chart was perfect. There is of course, some proving that needs done to account for muzzle velocity variance at long range but for the most part, the original charts that we learned to make in the classroom proved to be accurate out to 1066 yards!
Day 3- Max Point Blank, Wind and Shooting Positions
Back into the classroom to discuss our data that we had proven the day before and discuss how your trajectory max point blank or danger space works. This formula is used to determine where to hold center mass on a target and still successfully engage the target down rage (high side and low side) without making a turret elevation adjustment or “Holding Over”.
I found this information especially helpful when it comes to hunting. I can take my target’s estimated terminal kill zone size and create and estimate of “how big” that is and then use the taught data to find out exactly where I want my rifle zero set to deliver that terminal shot at a known distance without making turret adjustments. What a time saver this is!!!
The other topic that Caylen elaborated on was ballistic coefficient. After hitting steel out to 1066 and missing some as well, Caylen discussed why a high BC is better at longer ranges. With drop charts, your elevation adjustment is the easy part. The hard part is the wind and your bullets ability to overcome wind resistance.
This leads me into how Caylen taught us the ability to “read” the wind. For me, this is what separates amateur shooters (like me) from expert marksmen. Expert marksmen have the ability to make quick adjustments and target reengagement before those conditions change.
Caylen taught us how to read mirage and vegetation. There is great wind meters out there. I have a Kestrel but that is not going in the field with me. Where that comes in handy is for proving what I believe I am seeing. Teaching myself to read wind speed and direction visually and confirming what I am seeing with my Kestrel and finally with my downrange trajectory. What is my bullet doing downrange and is my wind call good, do I need to make adjustments? If so, what is my actual wind speed down range based off the adjustment that I just made?
Sound complicated? Well it is and the only way to get better is to practice. Oh boy, do I need a LOT of practice!!!
Here is a demonstration of three calibers and their individual ability to overcome wind resistance.
Example: Inches of wind drift from a 1 MPH wind from the 9 O’clock Position (This is an example and figures will vary based on each individual rifle, bullet type and muzzle velocity.)
|
Target Range in Yards |
.308 |
300 Win Mag |
6.5 Creedmoor |
|
300 |
.7 |
.4 |
.5 |
|
500 |
2.2 |
1.3 |
1.5 |
|
800 |
6.5 |
3.5 |
4.2 |
|
1000 |
11 |
5.8 |
7.1 |
Miss steel much? The answer to that could be wind calls that are off by simply 1 MPH, especially if you are shooting a .308 or similar. On a 10 inch target, if your wind call is off by 1 MPH, chances are, you are going to miss where as if you are shooting a 300 Win Mag or 6.5 Creedmoor you are still most likely ringing steel.
As a hunter and shooter, it feels great to have the tools to be able to create these comparative charts and understand and be able to apply the data in the field.
Once we had learned how to conceptually “read the wind” in class and had good comprehension of our individual calibers limitations in the wind at range, we went back into the field to practice our new tools.
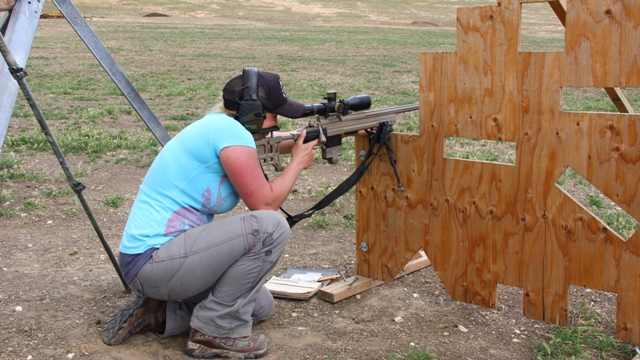 This time on the line, Caylen threw out a curve ball. No more prone shooting. Instead, we were to apply our new concepts for multiple shooting positions from barricades, tripods, anything that you could think of, we shot. This was our first opportunity to apply real hunting/in field positional shooting and a great opportunity to test our fundamentals.
From the prone, we have a dead steady rest, from the standing in a tripod; you have to learn to maneuver your rifle in a way that sets you up with a sight picture that is “steady enough” to engage the target while practicing fundamentals. If one tiny error is made, the steel is missed.
This was my first time shooting off of a tripod rest called “The Hog Saddle” which is like a gun vise that 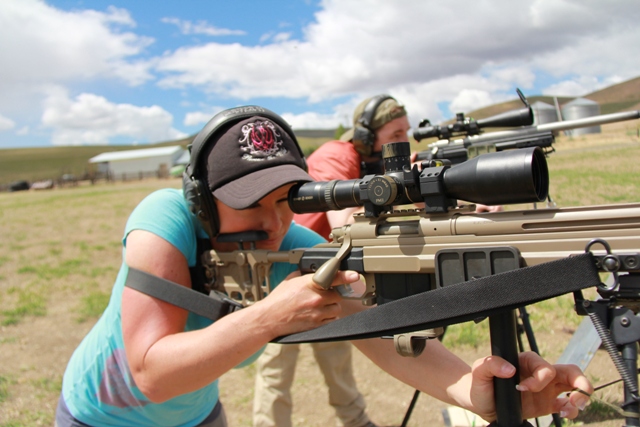 mounts to the top of a standard tripod and gives you a nearly dead solid resting position. I was banging steel out to the 1000 yard line while having the ability to watch my own trace and see my own impacts. With this system, I was able to make my own wind adjustments without a spotter and practice my new techniques of “reading the wind” independently.
Day 4-
Scope reticles…these can be confusing. What does each one of these lines translate to down range? Is your reticle in mils or minutes, if so, how many? Do you have a front focal plane scope or a rear focal plane scope? Do you really know what those tiny lines in your rifle scope mean?
Each scope and reticle system is different. Caylen was able to walk us through how to create a drop chart or reticle cards for our own reticle style.
We also learned that if we had a known target size and an unknown target range, we could use our mil reticle system to measure the target and establish a range estimation. Fundamentally for me, I was more interested in using this system to be able to measure antler or horn size in the field as it will work for that too.
Back out on the line of fire, we used our reticle to range estimate targets and engage those targets to determine our individual level of accuracy with the range estimation theory. Let me just tell you that I will be packing around my laser range finder as it is very difficult to measure and range estimate accurately.
Conclusion-
The 2013 Precision Rifle 1 course was very different from the 2012 course that I attended. The curriculum is a constant progression of information and Caylen is great about teaching on the level of the class. We ran numerous drills in addition to what was discussed in this blog. Some of those include drills were to demonstrate how accurate dialing windage and elevation is, we shot numerous targets getting off and on the gun to learn how to quickly achieve natural point of aim, and we even ran drills where we literally ran for each round to see how we would shoot under running and timed stress.
Precision Rifle 1 is a comprehensive entry level course in precision marksmanship, fundamental development, gear comprehension and the logistics in how to make it all work together. I am looking forward to attending Precision Rifle 2 in 2014. Stay tuned…

